
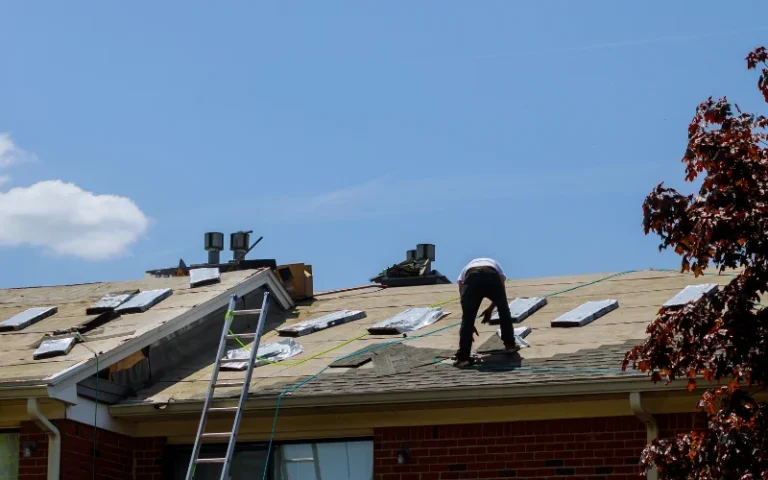

You’re looking up at your roof, and what you see sends a shiver down your spine. A missing shingle here, a cracked tile there, or perhaps a water stain creeping across your ceiling. Don’t panic. Roof damage, while concerning, is often repairable without calling in an emergency construction team. This guide will walk you through the essential steps to identify, assess, and repair common roof damage, empowering you to tackle these issues yourself and keep your home safe and dry.
Before you even think about grabbing a hammer, you need to understand the extent and nature of the damage. A thorough assessment is crucial for planning your repair and ensuring your safety.
Safety First: Prioritizing Your Well-being on the Roof
Before you even think about climbing onto your roof, pause and consider your safety. This isn’t a task to be taken lightly.
- Choose the Right Day: Never go on your roof during wet, windy, or icy conditions. A dry, calm day is essential for good footing and visibility.
- Secure Your Ladder: Ensure your ladder is sturdy, extends at least three feet above the roofline, and is placed on level ground. Have someone hold the base for added stability if possible.
- Wear Appropriate Gear: Wear non-slip shoes with good traction. Long sleeves and pants will protect your skin from scratches and UV rays. Don’t forget heavy-duty work gloves for handling materials.
- Consider a Safety Harness: For steeper roofs or extensive work, a safety harness anchored securely can be a lifesaver. It’s an investment worth making for your peace of mind and protection.
- Know Your Limits: If you’re uncomfortable with heights, the roof is too steep, or the damage seems extensive and complex, it’s always better to call a professional. Your safety is paramount.
From the Ground Up: Identifying Common Roof Problems
You don’t always need to climb onto the roof to spot potential problems. Many issues are visible from the ground or even from inside your home.
- Missing or Damaged Shingles: Look for curled, cracked, buckled, or missing shingles. These are clear indicators that your roof’s protective layer is compromised. Granule loss, visible as dark patches or granules in your gutters, also signals shingle deterioration.
- Sagging or Uneven Roofline: A noticeable dip or sag in your roof could indicate serious structural damage, water saturation, or compromised truss work. This is usually a sign that professional intervention is needed.
- Clogged or Damaged Gutters: Overflowing gutters can lead to water pooling around your foundation and even backing up under your shingles. Damaged gutters themselves offer less protection.
- Ventilation Issues: Rusting or damaged roof vents, or a lack of vents altogether, can lead to heat and moisture buildup in your attic, contributing to premature roof deterioration.
- Chimney and Flashing Problems: Look for cracks in mortar around your chimney, missing or bent flashing, or rust on metal flashing. These are prime areas for water entry.
- Interior Water Stains: Water stains on your ceilings or walls are definitive signs of a leak. Track the source – it might not be directly above the stain, as water can travel along beams before dripping.
Up Close and Personal: Inspecting on the Roof
Once you’ve safely ascended, a closer inspection will reveal the specifics of the damage. Take pictures for reference and insurance purposes.
- Shingle Evaluation: Gently lift the edges of shingles to check for soft spots or water damage beneath. Pay attention to areas around penetrations.
- Flashing Integrity: Carefully inspect all flashing – around chimneys, skylights, vents, and valleys. Look for tears, punctures, loose seals, or signs of rust.
- Sealant and Caulking: Check the condition of any caulk or sealant used around flashing or vents. If it’s cracked, brittle, or missing, it needs replacement.
- Decking and Underlayment: If shingles are missing, inspect the exposed roof decking for rot, soft spots, or water staining. The underlayment should be intact and securely fastened.
- Gutter and Downspout Connection: Ensure gutters are securely attached and downspouts are clear, directing water away from the foundation.
Essential Tools and Materials: Gearing Up for the Job
Having the right tools and materials is crucial for a successful and lasting repair. Don’t skimp on quality; good materials will protect your home for years.

Your Roof Repair Toolkit: What You’ll Need
Most common roof repairs can be tackled with a relatively standard set of tools.
- Sturdy Ladder: As mentioned, safety first.
- Pry Bar or Flat Bar: Essential for carefully lifting shingles and removing old nails.
- Hammer: For driving nails – a roofing hammer with a magnetic nail holder can be very helpful.
- Utility Knife or Hook Blade Knife: For cutting shingles or flashing. Keep extra blades handy as they dull quickly.
- Caulk Gun: For applying sealant or roofing cement.
- Tape Measure: For accurate cutting and placement of materials.
- Trowel or Putty Knife: For spreading roofing cement.
- Safety Glasses: Protect your eyes from debris.
- Work Gloves: Protect your hands.
- Chalk Line: For ensuring straight lines when replacing multiple shingles.
Materials for Common Roof Repairs: Stocking Up
The specific materials you need will depend on the type of damage you’re addressing.
- Replacement Shingles: Crucially, get shingles that match your existing ones in color, style, and brand if possible. Having a few spare shingles on hand is always a good idea.
- Roofing Nails: Use galvanized roofing nails – they are corrosion-resistant and have wider heads for better grip on shingles. Ensure they are long enough to penetrate the shingle and into the roof decking.
- Roofing Cement or Flashing Sealant: A thick, tar-like compound used for sealing, patching, and adhering shingles or flashing.
- Flashing Material: If you’re repairing or replacing flashing, you’ll need the appropriate type (e.g., galvanized steel, copper, aluminum) and gauge.
- Underlayment/Tar Paper: If the damage extends to the underlayment, you’ll need a roll of roofing felt or synthetic underlayment.
- Wood Planks/Plywood: For patching damaged roof decking.
- Gritted Roll Roofing (for small patches): A self-adhesive material with granules that can be used for very minor patches.
Repairing Common Roof Damage: A Step-by-Step Guide
Now that you’ve assessed the damage and gathered your tools, it’s time to get to work. Remember to work patiently and meticulously.
Fixing Missing or Damaged Shingles: The Most Common Repair
This is perhaps the most frequent roof repair you’ll encounter.
- Prep the Area: Carefully use your pry bar to gently lift the bottom edges of the surrounding shingles (the ones above the damaged area). Be careful not to crease or break them.
- Remove Old Nails: Locate and remove any nails holding the damaged shingle in place. Use the claw of your hammer or the pry bar.
- Extract the Damaged Shingle: Once the nails are out and the surrounding shingles are lifted, slide out the damaged or missing shingle. If it’s stubborn, you might need to cut it with your utility knife.
- Inspect the Underlayment: Check the underlayment and decking beneath. If they are torn, wet, or rotted, you’ll need to repair those first (see section on decking repair). Apply roofing cement to any small tears in the underlayment and smooth it down.
- Insert New Shingle: Slide a new shingle into place, ensuring it aligns perfectly with the exposed portion of the shingle below it.
- Secure the New Shingle: Lift the overlapping shingles above and nail the top edge of the new shingle to the roof decking. Place nails about 1 inch in from each side and just below the tar strip. Some manufacturers recommend four nails, others six; follow the shingle manufacturer’s guidelines. Don’t nail through the exposed part of the shingle.
- Seal it Up: Apply a small dab of roofing cement under the tabs of the lifted shingles above to seal them down. This helps prevent wind uplift. Press firmly to ensure adhesion.
Addressing Leaking Flashing: Sealing Vulnerable Spots
Flashing is crucial for sealing areas around penetrations. Leaks here are common.
- Identify the Leak Source: Water stains on ceilings often track back to compromised flashing around chimneys, vents, or skylights. Look for cracked caulk, loose nails, or rusted metal.
- Clean and Dry the Area: Thoroughly clean any dirt, debris, or old caulk from around the flashing. Ensure the area is completely dry before proceeding.
- Minor Repairs (Caulk/Sealant): For small cracks in existing caulk or very minor separation, clean the area and apply a generous bead of high-quality, exterior-grade flashing sealant or roofing cement. Smooth it with a trowel or putty knife to ensure a watertight seal. Feather the edges to prevent water pooling.
- Major Repairs (Replacing Flashing): If the flashing is severely damaged, rusted, or bent, it’s often best to replace the section. This is a more involved process.
- Carefully Remove Shingles: You’ll need to lift or remove the shingles around the damaged flashing to access it.
- Remove Old Flashing: Carefully pry up and remove the old flashing. Be gentle to avoid damaging the surrounding roof structure.
- Inspect Underlayment: Check the underlayment and decking for moisture or damage and repair as necessary.
- Install New Flashing: Cut and shape the new flashing to fit. Slide it into place, ensuring it laps correctly with adjacent flashing and under shingles.
- Secure and Seal: Nail the new flashing in place using galvanized roofing nails. Apply roofing cement under the edges where it meets the roof deck and over the heads of any exposed nails. Re-lay the shingles over the flashing, securing them with nails and dabs of roofing cement, just as you would when replacing individual shingles.
- Counter-Flashing (Chimneys/Walls): For chimneys or walls, ensure the counter-flashing is properly embedded into the mortar joint or wall, then sealed over the base flashing.
Repairing Punctures or Small Holes: Quick Fixes for Minor Damage
Accidental punctures from falling debris or foot traffic can create small holes.
- Clean the Area: Remove any loose debris around the puncture. Ensure the area is dry.
- For Shingles:
- Small Holes (Pinholes): Apply a generous dab of roofing cement over the hole and spread it outwards. You can embed a small patch of spare shingle material or even canvas into the cement for added durability, then apply another thin layer of cement over it.
- Larger Holes/Tears: If the hole is larger than a quarter, consider replacing the entire shingle. If that’s not feasible, you can cut a patch from a spare shingle that slightly overlaps the damaged area. Apply roofing cement to the underside of the patch and firmly press it over the hole. Seal the edges with more cement.
- For Flat Roofs (e.g., shed roofs):
- Clean the area thoroughly. Cut a patch from appropriate roofing material (e.g., modified bitumen, EPDM) that extends at least 6 inches beyond the hole in all directions. Apply a generous layer of suitable roofing adhesive or cement to the roof, then firmly press the patch into place. Roll it with a roller to ensure full adhesion and no air bubbles. Seal the edges with more adhesive.
Dealing with Damaged Roof Decking: When the Foundation is Compromised
If you find soft spots or rot when inspecting for shingle damage, your roof decking needs attention.
- Remove Overlying Materials: Carefully remove the shingles and underlayment from the damaged area, extending a few inches beyond the visible rot.
- Cut Out Damaged Wood: Using a circular saw set to the depth of your decking, carefully cut out the rotted section. Make square cuts between trusses or rafters if possible. If not, you’ll need to add blocking for support.
- Inspect Framing: Check the underlying rafters or trusses for any rot or damage. If they are compromised, you may need a professional for structural repair.
- Install Blocking (if needed): If your cut doesn’t end on a rafter, cut and install wood blocking between the rafters to provide a secure nailing surface for the new decking. Secure with screws.
- Cut and Install New Plywood: Cut a piece of exterior-grade plywood (matching the thickness of your existing decking) to fit perfectly into the opening.
- Secure New Decking: Nail the new plywood patch securely to the rafters or blocking with galvanized roofing nails or screws.
- Install Underlayment: Lay a new piece of underlayment over the patched area, overlapping existing underlayment by at least 6 inches. Secure with cap nails or staples.
- Re-lay Shingles: Re-install the shingles over the new underlayment, following the standard procedure for shingle replacement.
Maintaining Your Roof: Prevention is Key
Once you’ve made your repairs, the best way to avoid future issues is proactive maintenance. You’ve done the hard work of fixing it; now protect your investment.
Regular Inspections: Your Eyes on the Prize
Don’t wait for a leak to appear. Regular checks can catch problems before they become major.
- Spring and Fall Routine: Make it a habit to inspect your roof every spring and fall. These are ideal times, as you can spot winter damage before summer heat bakes it in, or prepare for winter by fixing any summer-induced wear.
- After Severe Weather: Always inspect your roof after a major storm, high winds, or heavy hail. Even if you don’t see obvious damage, a quick check can confirm everything is sound.
- Attic Check: Don’t forget to inspect your attic periodically. Look for signs of moisture, water stains on the underside of the roof deck, or mold growth. This can indicate a slow leak you haven’t noticed from outside.
Keeping it Clean: Gutters and Debris
A clean roof and gutter system are fundamental to a healthy roof.
- Clear Gutters Regularly: Clogged gutters are one of the leading causes of roof and foundation damage. Clear them of leaves, twigs, and debris at least twice a year, more if you have many trees nearby. Ensure downspouts are clear and directing water away from your home.
- Remove Debris from the Roof: Leaves, branches, and other debris can trap moisture, promote algae and moss growth, and even physically damage shingles. Gently sweep or blow them off your roof. Avoid harsh scraping that might damage granules.
- Trim Overhanging Branches: Reduce the amount of debris on your roof by trimming any tree branches that directly overhang your roof. This also prevents branches from scraping shingles in windy conditions and falling onto your roof during storms.
Moss and Algae Control: Fighting Green Invaders
Moss and algae not only look bad but can also shorten your roof’s lifespan by holding moisture and degrading shingles.
- Gentle Cleaning Solutions: For mild cases of algae (black streaks), a diluted solution of oxygen bleach (not chlorine bleach, which can damage shingles) and water can be gently sprayed on. Let it sit, then rinse thoroughly with a garden hose – no high-pressure washing!
- Zinc or Copper Strips: Installing zinc or copper strips along the ridge of your roof can prevent moss and algae growth. Rain washes tiny particles of these metals down the roof, which are toxic to the organisms.
- Professional Cleaning: For heavy moss growth, consider hiring a professional roof cleaning service that specializes in gentle, roof-safe removal methods. Avoid power washing, which can strip shingle granules and force water under shingles.
By following these guidelines, you’ll be well-equipped to tackle common roof damage, keep your home protected, and extend the life of your most important structural element. Remember, for anything beyond your comfort level or expertise, a qualified roofing professional is always the best call. Happy repairing!
FAQs
What are common causes of roof damage?
Common causes of roof damage include severe weather such as hail, wind, and heavy rain, as well as aging and lack of maintenance. Other factors like fallen debris, tree branches, and animal activity can also contribute to roof damage.
How can I identify roof damage?
You can identify roof damage by looking for signs such as missing or damaged shingles, water stains on the ceiling, sagging areas, and visible cracks or holes. It’s important to inspect your roof regularly, especially after severe weather events.
Can I fix roof damage myself?
Minor roof damage such as small leaks or missing shingles can be fixed by homeowners with some DIY experience. However, for more extensive damage or if you’re unsure about the extent of the damage, it’s best to hire a professional roofing contractor to assess and repair the damage.
What are the steps to fix roof damage?
The steps to fix roof damage include assessing the extent of the damage, gathering the necessary materials and tools, making the repairs (such as replacing shingles or sealing leaks), and conducting a thorough inspection to ensure the roof is properly repaired.
How can I prevent future roof damage?
To prevent future roof damage, it’s important to conduct regular roof inspections, keep gutters clean and free of debris, trim overhanging tree branches, and address any minor issues promptly. Additionally, consider investing in high-quality roofing materials and professional installation to ensure the longevity of your roof.


