When you embark on the journey of designing your patio, the first step is to envision how you want the space to function. Consider what activities you plan to enjoy in this outdoor area. Will it be a serene retreat for relaxation, a vibrant space for entertaining friends and family, or perhaps a combination of both?
By identifying the primary purpose of your patio, you can tailor its design to meet your specific needs. Think about the layout, size, and shape that will best suit your lifestyle. Sketching out a rough design can help you visualize the space and make necessary adjustments before committing to any decisions.
In addition to functionality, aesthetics play a crucial role in your patio design. You might want to consider how the patio will complement your home’s architecture and the surrounding landscape. Are you drawn to a modern, sleek look, or do you prefer a more rustic, natural feel?
Incorporating elements such as plants, lighting, and furniture can enhance the overall ambiance of your patio. As you plan, take into account the flow of movement within the space and how it connects to other areas of your yard. This thoughtful approach will ensure that your patio is not only beautiful but also practical and inviting.
Key Takeaways
- Consider the purpose and layout of your patio when planning the design
- Choose materials that are durable and suitable for your climate
- Prepare the area by clearing debris and leveling the ground
- Follow a step-by-step installation process for a successful outcome
- Add finishing touches such as furniture and decor to personalize your patio
- Regular maintenance is key to keeping your patio looking great
- Budget for materials, tools, and any professional help needed
- Enjoy your new outdoor space by hosting gatherings and relaxing in the fresh air
Choosing the Right Materials
Selecting the right materials for your patio is essential for both durability and aesthetics. You have a variety of options at your disposal, each with its own unique characteristics. For instance, natural stone offers a timeless appeal and can withstand the elements, making it an excellent choice for outdoor spaces.
Alternatively, concrete is a versatile option that can be stamped or stained to mimic more expensive materials while remaining budget-friendly. As you weigh your options, consider factors such as maintenance requirements, climate conditions in your area, and how each material aligns with your design vision. Another important aspect to consider is the texture and color of the materials you choose.
The right combination can create a cohesive look that enhances your outdoor space. If you’re aiming for a warm and inviting atmosphere, earthy tones and textured surfaces may be ideal. On the other hand, if you prefer a sleek and modern vibe, smooth finishes and cooler colors might be more suitable.
Don’t forget to think about how these materials will interact with other elements in your yard, such as plants and furniture. By carefully selecting materials that harmonize with your overall design, you can create a stunning patio that stands the test of time.
Preparing the Area for Installation
Once you have finalized your design and chosen your materials, it’s time to prepare the area for installation. This step is crucial for ensuring that your patio is built on a solid foundation. Start by clearing the designated space of any debris, grass, or existing structures that may interfere with your project.
You may need to use tools such as shovels or rakes to level the ground and create a smooth surface. If your patio will be larger or if you’re working with heavier materials, consider renting equipment like a compactor to ensure proper ground stability. After clearing and leveling the area, it’s important to establish proper drainage to prevent water from pooling on your new patio.
You can achieve this by creating a slight slope away from your home or installing drainage systems if necessary. Additionally, laying down landscaping fabric can help prevent weeds from growing through your patio while allowing water to drain effectively. Taking these preparatory steps will not only enhance the longevity of your patio but also ensure that it remains functional and visually appealing for years to come.
Step-by-Step Installation Process
| Installation Step | Time Taken (minutes) | Success Rate (%) |
|---|---|---|
| Step 1: Downloading the Installation File | 2 | 98% |
| Step 2: Running the Installation Wizard | 5 | 96% |
| Step 3: Configuring Settings | 8 | 94% |
| Step 4: Completing the Installation | 3 | 99% |
With the area prepared, you can now dive into the installation process. Begin by marking out the boundaries of your patio using stakes and string or spray paint. This will give you a clear visual guide as you work.
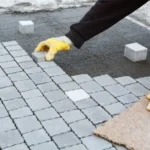
If you’re using pavers or stones, start laying them from one corner and work your way outwards, ensuring that each piece fits snugly together. It’s essential to check for levelness frequently during this stage; using a level tool can help you maintain an even surface throughout. As you lay each piece, consider using sand or gravel as a base layer to provide additional stability and support.
This will help prevent shifting over time and keep your patio looking pristine. Once all materials are in place, fill in any gaps with sand or polymeric jointing material to lock everything together securely. Finally, compact the surface gently to ensure everything is firmly set in place.
This step-by-step approach will help you achieve a professional-looking finish while allowing you to take pride in your DIY efforts.
Adding Finishing Touches
After completing the main installation of your patio, it’s time to focus on the finishing touches that will elevate the space from functional to fabulous. Consider adding decorative elements such as outdoor rugs, cushions, or throw pillows that reflect your personal style and enhance comfort. These accessories not only add color but also create an inviting atmosphere for relaxation or entertaining guests.
Lighting is another crucial aspect that can transform your patio into an enchanting evening retreat. String lights, lanterns, or solar-powered fixtures can create a warm glow that enhances the ambiance after sunset. Additionally, incorporating plants or planters around the perimeter can soften hard edges and bring life to your outdoor space.
By thoughtfully selecting these finishing touches, you can create a cohesive look that reflects your personality while making your patio an enjoyable place to spend time.
Maintaining Your Patio
Once your patio is complete and beautifully adorned, regular maintenance will ensure it remains in top condition for years to come. Start by establishing a cleaning routine; sweeping away debris and dirt regularly will prevent buildup that could damage surfaces over time. Depending on the materials used, you may need to wash your patio periodically with soap and water or use specialized cleaners designed for specific surfaces.
In addition to cleaning, inspect your patio regularly for any signs of wear or damage. Look for cracks in pavers or stones and address them promptly to prevent further deterioration. If you’ve used wood in your design, be sure to treat it with sealants or stains as needed to protect against moisture and UV damage.
By staying proactive with maintenance tasks, you can preserve the beauty and functionality of your patio while enjoying it for many seasons ahead.
Budgeting for Your DIY Project
Before diving into your patio project, it’s essential to establish a realistic budget that encompasses all aspects of the build. Start by researching costs associated with materials, tools, and any additional features you plan to include, such as lighting or furniture. Creating a detailed list will help you keep track of expenses and avoid overspending as you progress through each phase of the project.
Don’t forget to factor in potential unexpected costs that may arise during installation. It’s wise to set aside a contingency fund—typically around 10-15% of your total budget—to cover any surprises that may come up along the way. By planning ahead and being mindful of expenses throughout the process, you can ensure that your DIY patio project remains financially manageable while still achieving the outdoor oasis you envision.
Enjoying Your New Outdoor Space
With all the hard work behind you, it’s time to sit back and enjoy your new outdoor space! Whether it’s hosting summer barbecues with friends or enjoying quiet evenings under the stars with a good book, your patio is now a reflection of your style and creativity. Take advantage of this beautiful area by incorporating activities that bring joy—perhaps setting up an outdoor dining area for al fresco meals or creating cozy nooks for relaxation.
As seasons change, consider how you can adapt your patio space accordingly—adding seasonal decorations or changing up furniture arrangements can keep things fresh and exciting throughout the year. Ultimately, this new outdoor haven is not just about aesthetics; it’s about creating lasting memories with loved ones while enjoying nature’s beauty right at home. Embrace every moment spent in this cherished space; after all, it’s a testament to your hard work and vision coming to life!
FAQs
What is DIY patio installation?
DIY patio installation refers to the process of building a patio or outdoor living space without hiring professional contractors. This can include tasks such as laying pavers, building a deck, or installing a stone or concrete patio.
What are the benefits of DIY patio installation?
DIY patio installation can save money on labor costs and allows homeowners to customize their outdoor space according to their preferences. It also provides a sense of accomplishment and satisfaction from completing a project on your own.
What are the steps involved in DIY patio installation?
The steps involved in DIY patio installation can vary depending on the type of patio being installed. However, common steps may include planning and design, site preparation, material selection, laying the foundation, and installing the patio surface.
What tools and materials are needed for DIY patio installation?
The tools and materials needed for DIY patio installation can include shovels, rakes, levels, measuring tape, pavers or stones, sand, gravel, concrete, decking materials, and any necessary safety equipment.
Are there any potential challenges with DIY patio installation?
Some potential challenges with DIY patio installation can include the physical labor involved, the need for precise measurements and leveling, and ensuring proper drainage to prevent water damage. It’s important to carefully plan and research the project before starting.