
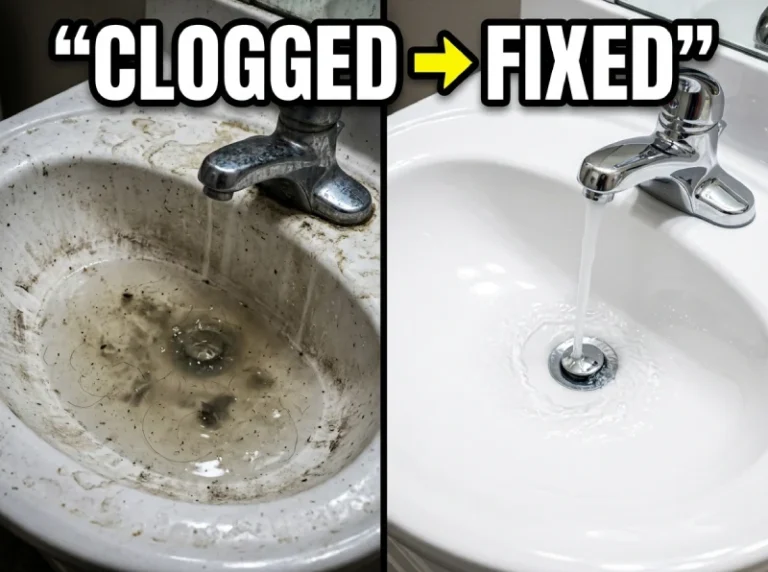

You’ve faced it. That slow drip, then a gurgle, and finally, the dreaded pool of stagnant water. Your sink or shower is clogged, and the water is refusing to go down. It’s a common household problem, and while it can feel frustrating, it’s usually quite manageable with the right approach. This guide is designed to walk you through the process, empowering you to tackle those pesky clogs and restore the flow in your home. We’ll cover everything from simple, non-toxic methods to more involved techniques for those stubborn blockages. So, put on your brave face (and maybe some old clothes), and let’s get your drains flowing freely again.
Before you dive headfirst into plunging and pouring, it’s beneficial to have a general understanding of what might be causing the blockage. This knowledge can help you choose the most effective solution and even prevent future issues. Think of it as a mini-diagnosis to tailor your treatment.
Common Kitchen Sink Offenders
Your kitchen sink is a busy hub, and its drain bears the brunt of food preparation and waste disposal. Over time, a variety of substances can accumulate, creating a blockage.
Grease and Fat Buildup
One of the most prevalent culprits in kitchen sinks is grease and fat. When hot, liquid grease is poured down the drain, it appears harmless. However, as it cools, it solidifies, coating the inside of your pipes. Over time, this fatty residue traps other debris – food particles, soap scum, and hair – creating a sticky, progressively constricting mass that will eventually halt water flow. It’s like building a dam, one greasy layer at a time.
Food Scraps and Debris
While most people are mindful of what goes down the drain, small food particles, coffee grounds, and even tiny bits of eggshells can escape the garbage disposal or sink strainer. These seemingly insignificant items can accumulate in the trap or the pipework, acting as anchors for grease and other materials to cling to. Over time, they form a dense, difficult-to-dislodge plug.
Starchy Foods and Fibrous Vegetables
Certain foods, particularly those high in starch like rice and pasta, can swell when they absorb water. If significant amounts are poured down the drain, they can expand and solidify, creating a gummy, obstructive mass. Similarly, fibrous vegetables such as celery, asparagus, and potato peels can get caught in the pipe’s bends and create a tangled barrier.
Bathroom Sink and Shower Drain Blockages
The bathroom presents its own unique set of challenges when it comes to drain clogs, often involving different types of debris than what you’d find in the kitchen.
Hair Accumulation
This is arguably the leading cause of bathroom sink and shower drain clogs. As you wash your hair, fine strands inevitably wash down the drain. While individually small, these hairs are excellent at weaving together, catching soap scum, and forming a dense mat. This hairball, often reinforced by conditioner and shampoo residue, can quickly create a significant blockage, especially in the U-shaped trap beneath your sink or the drain cover in your shower.
Soap Scum
The compounds in bar soaps and liquid soaps can react with hard water minerals to create soap scum. This sticky, waxy substance adheres to the inside of your pipes, narrowing the diameter and trapping other debris like hair and small particles. Over time, this buildup can become quite substantial, impeding water flow.
Toiletries and Personal Care Products
Small items like cotton swabs, dental floss, hair ties, and even small pieces of plastic packaging can accidentally slip down the drain. These items don’t break down easily and can snag on imperfections in the pipes, forming a blockage or contributing to existing ones. While less common in sinks and showers than in toilets, they can still be a factor.
Troubleshooting Based on the Type of Fixture
The location of the clog can also provide clues. A kitchen sink clog might be more likely to involve grease, while a shower clog is almost certainly hair-related.
Kitchen Sink Specifics
If your kitchen sink is clogged, consider the last thing you washed or disposed of. Did you recently pour bacon grease down? Did you grind up a lot of coffee grounds? Knowing these details can help you decide whether to start with a degreaser or a method specifically designed to break down solid debris.
Bathroom Sink and Shower Specifics
For bathroom sinks and showers, your primary suspect is hair. Therefore, methods that are effective at removing hair, like a drain snake or a tool designed for hair removal, should be high on your list.
Your First Line of Defense: Simple & Safe Solutions
Before reaching for harsh chemicals, let’s explore some effective and environmentally friendly methods to tackle common drain clogs. These often work best for minor blockages and are safe for most plumbing systems.
The Boiling Water Flush
This is the simplest and often surprisingly effective first step for greasy clogs in kitchen sinks.
How to Perform the Boiling Water Flush
- Boil Water: Fill a kettle or a large pot with water and bring it to a rolling boil on your stove.
- Clear the Sink: Remove any standing water from the sink if possible. You can use a cup or small pitcher to scoop it out.
- Pour Carefully: Once the water is boiling, slowly and carefully pour the hot water directly down the drain in stages.
- Wait and Observe: Allow the hot water to work for a few minutes. The heat can help to melt and loosen grease and soap scum.
- Test the Flow: Run your tap with warm water to see if the clog has cleared. You may need to repeat this process a few times for stubborn grease buildup.

Important Considerations:
- Avoid with PVC Pipes (Cautiously): While generally safe, excessive use of boiling water on very old or damaged PVC pipes could theoretically cause softening. For most modern PVC plumbing, it’s fine. If you have very old metal pipes or are unsure, use very hot tap water instead of boiling.
- Not for Solid Blockages: Boiling water is primarily effective against grease and soap scum. It won’t dissolve solid objects like hair or food chunks.
The Baking Soda and Vinegar Volcano
This classic DIY concoction uses a chemical reaction to break down clogs. It’s a natural and effective alternative to commercial drain cleaners.
The Science Behind It
When baking soda (a base) and vinegar (an acid) are combined, they create a vigorous fizzing reaction that produces carbon dioxide gas. This bubbling action can help to dislodge buildup within the pipes.
Step-by-Step Guide to the Baking Soda and Vinegar Method
- Remove Standing Water: As with the boiling water method, clear any standing water from the clogged fixture.
- Pour Baking Soda: Pour about half a cup to one cup of baking soda directly down the drain. Try to get as much as possible into the drain opening.
- Pour Vinegar: Immediately after the baking soda, pour an equal amount of white vinegar down the drain.
- Cover the Drain: Quickly cover the drain opening with a stopper or a damp cloth. This traps the gas produced, directing the fizzing action downwards into the pipes rather than upwards.
- Let it Work: Let the mixture sit and fizz for at least 30 minutes, or even longer (up to a few hours) for tougher clogs. You’ll likely hear and see bubbling.
- Flush with Hot Water: After the waiting period, remove the cover and flush the drain with plenty of hot tap water (or repeat the boiling water flush for extra power).
- Test the Flow: Assess if the clog has cleared by running the tap.
Tips for Success:
- Combine with Boiling Water: For an extra boost, follow the baking soda and vinegar treatment with a kettle of boiling water.
- Repeat if Necessary: For persistent clogs, you may need to repeat this process.
The Plunger Power
A good old-fashioned plunger is one of the most effective tools for clearing many types of clogs, especially those in toilets and sinks.
Choosing the Right Plunger
There are two main types:
- Cup Plunger: A standard, bell-shaped plunger. Best for flat surfaces like sinks and bathtubs.
- Flange Plunger (Toilet Plunger): Has an extra flap (flange) that extends downwards. This is specifically designed to create a better seal in the toilet bowl.
How to Plunge Effectively
- Create a Seal: Ensure there’s enough water in the fixture to cover the plunger cup. If not, add some water. For sinks, you might need to block off the overflow drain with a wet rag to create a better seal.
- Position the Plunger: Place the plunger directly over the drain opening, ensuring a complete seal.
- Plunge with Force: Push down firmly but smoothly to expel air, then pull upwards sharply to create suction. The key is the pulling action.
- Repeat and Vigorously: Continue this up-and-down motion vigorously for 15-20 seconds. The goal is to create enough pressure and suction to dislodge the clog.
- Check for Flow: After a few minutes of plunging, remove the plunger and see if the water drains.
- Repeat if Needed: You may need to repeat the plunging process several times.
Important Nuances:
- Toilet Plunging: Always ensure the plunger has a good seal around the toilet bowl’s outlet.
- Sink and Tub Plunging: For tubs and sinks, block the overflow drain with a wet rag to maximize suction.
These foundational methods are your starting point for a clog-free home. They are safe, cost-effective, and often all you need.
Tackling Stubborn Blockages: When Simple Isn’t Enough
If the boiling water, baking soda, and plunger haven’t done the trick, it’s time to bring out the bigger guns. These methods involve a bit more effort and sometimes specialized tools, but they are highly effective for those more entrenched clogs.
The Drain Snake (Auger) Method
A drain snake, also known as an auger, is a flexible coil of wire designed to physically break up or retrieve clogs lodged deeper in the pipe.
Understanding How a Drain Snake Works
The snake’s end is typically a coiled spring or a small auger screw. You feed this end into the drain and turn a handle. As you push and rotate, the snake navigates bends in the pipe, eventually reaching the clog. Once it makes contact, you can push, pull, and twist to break apart the blockage or snag it to pull it out.
Step-by-Step Guide to Using a Drain Snake
- Prepare the Area: Lay down old towels or newspapers around the drain, as this process can be messy.
- Insert the Snake: Feed the end of the drain snake into the drain opening.
- Advance the Snake: Gently push the snake further into the pipe. You’ll feel resistance when you reach a bend or a clog.
- For Clogs: Once you encounter resistance, you’ve likely hit the clog. Begin to crank the handle while applying gentle pressure. Push and pull the snake slightly to try and break up the blockage.
- For Retrieval: If you suspect the clog is something you can pull out (like hair), try to engage the snake with the clog. Once you feel it has grabbed something, slowly and carefully pull the snake back out.
- Clear the Obstruction: If you’re breaking up a clog, continue rotating and maneuvering the snake until it feels like the resistance has lessened. If you’re retrieving, carefully pull the debris out of the drain.
- Flush with Hot Water: Once you believe the clog is cleared or removed, flush the drain with plenty of hot water to wash away any remaining debris and clear the pipe.
- Repeat if Necessary: If the drain is still sluggish, you may need to re-snake the drain for another attempt.
Types of Drain Snakes:
- Handheld Snakes: Smaller, more manageable snakes for sinks and showers.
- Drum Augers: Larger, more robust snakes often used by professionals for more severe clogs and longer pipe runs.
The Drain Weasel for Hair Obstructions
The Drain Weasel is a specific type of tool designed precisely to tackle the most common cause of bathroom clogs: hair. It’s a flexible plastic rod with barbs along its length, and it’s incredibly effective for shallow hair clogs.
How the Drain Weasel Excels at Hair Removal
Unlike a drain snake that might push hair further down or require more force, the Drain Weasel’s barbs snag individual strands of hair, allowing you to easily pull them out. It’s a less aggressive and often cleaner way to deal with hairballs.
Using the Drain Weasel
- Access the Drain: If possible, remove the drain stopper or strainer.
- Insert the Weasel: Feed the barbed end of the Drain Weasel into the drain.
- Gently Maneuver: Push and twist the Weasel gently, feeling for resistance. The barbs will catch on hair.
- Pull Out the Debris: Once you’ve snagged hair, slowly and steadily pull the Drain Weasel straight up and out of the drain. The barbs should hold the hair.
- Dispose and Clean: Dispose of the collected hair and rinse the Drain Weasel.
- Flush with Water: Run hot water down the drain to confirm the clog is gone.
- Repeat if Necessary: If you pull out a significant amount of hair but the drain is still slow, repeat the process.
Key Advantage: The Drain Weasel is less likely to cause damage to your pipes compared to more aggressive methods, making it an excellent choice for routine maintenance and initial clog removal in bathrooms.
Venturing into Chemical Cleaners (Use with Caution!)
Chemical drain cleaners can be effective, but they are also the most corrosive and come with the most risks. Always use them as a last resort and with extreme caution.
Understanding the Risks and Precautions
Chemical drain cleaners work by dissolving organic matter like grease, hair, and soap scum. However, they can also damage:
- Pipes: Especially older metal pipes (lead, galvanized steel) or joints not designed for their powerful chemicals.
- Faucets and Fixtures: The chemicals can discolor or etch surfaces.
- Your Skin and Eyes: They are highly corrosive and can cause severe burns.
- Septic Systems: They can disrupt the beneficial bacteria in septic tanks.
- Future Plumbing Work: If chemicals remain in the pipes, they can react dangerously with other substances, including acidic drain cleaners or even water, if plumbers have to work on the pipes later.
Essential Safety Measures
- Read and Follow Instructions: Never deviate from the product’s instructions.
- Ventilation: Ensure the area is well-ventilated. Open windows and turn on exhaust fans.
- Protective Gear: Always wear chemical-resistant gloves and eye protection (goggles or safety glasses).
- Never Mix Chemicals: Absolutely never mix different drain cleaners or use a drain cleaner immediately after using baking soda and vinegar. This can create dangerous fumes or explosive reactions.
- Avoid if You Just Plunged: If you’ve used a plunger, there might be residual chemicals in the sink, posing a risk if you then use a chemical cleaner.
- Small Amounts First: For milder clogs, start with the smallest recommended amount of cleaner.
How to Use Chemical Drain Cleaners Safely
- Remove Standing Water: If possible, remove as much standing water from the fixture as you can.
- Measure Carefully: Use the exact amount recommended on the product label. Too much can increase the risk of pipe damage.
- Pour Slowly and Directly: Pour the cleaner slowly and directly into the drain opening. Avoid splashing.
- Allow Adequate Time: Let the cleaner sit for the duration specified on the label (usually 15-30 minutes). Do not leave it longer than recommended, as this increases the risk of pipe damage.
- Flush Thoroughly: After the recommended time, flush the drain with a large volume of cold water. Using hot water can sometimes react with the chemicals, releasing more fumes or causing damage.
- Test the Drain: Check if the water now drains freely.
- Repeat (with extreme caution): If the clog persists, you may be able to repeat the process one more time, strictly following all safety guidelines.
Products to Consider (Follow Instructions Faithfully):
- Lye-based cleaners: Effective for grease and hair clogs.
- Enzyme-based cleaners: Slower-acting but gentler on pipes, breaking down organic matter over time.
Remember, this is a last resort for a reason. If you’re unsure or uncomfortable, it’s better to call a professional.
When to Call in the Professionals: The Expert’s Touch
| Step | Description |
|---|---|
| 1 | Remove any visible debris from the drain |
| 2 | Use a plunger to try to dislodge the clog |
| 3 | Pour boiling water down the drain |
| 4 | Use a mixture of baking soda and vinegar to break up the clog |
| 5 | Try using a plumber’s snake to remove the clog |
| 6 | Call a professional plumber if the clog persists |
There are times when even your best DIY efforts won’t be enough, or the problem is beyond your comfort level. Knowing when to call a plumber is a sign of good judgment and can save you from further damage or frustration.
Signs You Need a Plumber
- Multiple Clogged Drains: If you have more than one drain in your house that is clogged simultaneously, it could indicate a blockage further down your main sewer line.
- Persistent Blockages: If you’ve tried multiple methods and the clog consistently returns or won’t clear, it’s time for professional assessment.
- Foul Odors: Persistent, unpleasant odors emanating from drains can signal a serious issue, such as a buildup of sewage or a problem with your vent system.
- Water Backing Up in Unexpected Places: If flushing your toilet causes your shower or sink to back up, or vice versa, this is a strong indicator of a main line clog.
- Slow Draining Throughout the House: If all your drains are draining slowly, it points to a significant issue with your main sewer line.
- Lack of Confidence or Tools: If you’re not comfortable with the methods, don’t have the right tools, or the clog seems particularly severe, a plumber has the expertise and specialized equipment.
Professional Tools and Techniques
Plumbers have access to advanced tools that can quickly and efficiently diagnose and clear even the most stubborn clogs.
P-Trap Removal for Stubborn Blockages
The P-trap is the U-shaped pipe under your sink. This is a common place for clogs to form, and sometimes, the only way to effectively clear a severe blockage here is to disassemble it.
How a Plumber Might Approach P-Trap Issues
- Preparation: A plumber will place a bucket underneath the P-trap to catch any water and debris.
- Disassembly: They will carefully loosen the slip-nut connectors holding the P-trap in place.
- Cleaning: Once removed, the P-trap can be thoroughly cleaned or replaced if it’s damaged.
- Inspection: A plumber can also use this opportunity to inspect the pipes leading away from the trap for any further issues.
- Reassembly: The trap is then reassembled securely.
This is a task that requires a bit of mechanical know-how and the right tools, which is why it’s often best left to a professional if you’re not experienced with plumbing repairs.
Drain Camera Inspection
For complex or recurring clogs, plumbers can use specialized cameras to visually inspect the inside of your pipes. This allows them to pinpoint the exact location and nature of the blockage (e.g., tree roots, collapsed pipe, foreign object) and determine the most effective removal method.
Hydro-Jetting
This is a powerful cleaning method where a high-pressure water jet is used to blast away stubborn clogs, grease, and debris from the inside of the pipes. It’s highly effective for thoroughly cleaning out sewer lines and larger pipes.
Calling a professional plumber is not a sign of failure, but a smart decision when facing a problem that requires expertise, specialized equipment, or when your DIY attempts have been unsuccessful.
Preventing Future Clogs: Proactive Measures for a Smooth Flow
Once you’ve successfully cleared a clog, you’ll want to do everything you can to prevent it from happening again. Proactive maintenance is key to keeping your drains flowing freely and avoiding future headaches.
Simple Habits for a Clearer Future
Small, consistent habits can make a significant difference in maintaining your plumbing.
Use Sink Strainers
This is perhaps the easiest and most effective preventative measure. Place strainers in all your sink drains (kitchen and bathroom) and shower drains. These catch hair, food particles, and other debris before they can enter the pipe and cause a clog. Empty the strainers regularly.
Be Mindful of What Goes Down the Drain
This is especially true for your kitchen sink.
- Avoid Pouring Grease and Oils: Never pour cooking grease, oil, or fat down the drain. Wipe greasy pans with paper towels before rinsing, or pour cooled grease into a disposable container and throw it in the trash.
- Scrape Plates Thoroughly: Scrape food scraps into the trash or compost bin before rinsing plates.
- Limit Coffee Grounds and Eggshells: While garbage disposals can handle some, significant amounts of coffee grounds and eggshells can contribute to clogs over time.
- Avoid Starchy Foods and Fibers: If you have a garbage disposal, use it sparingly for fibrous vegetables and starchy foods.
Regular Cleaning and Maintenance
Don’t wait for a clog to appear. Incorporate these simple maintenance steps into your routine.
- Monthly Baking Soda Flush: Once a month, pour about half a cup of baking soda down each drain, followed by hot water. This helps to keep buildup at bay.
- Monthly Boiling Water Flush (Kitchen Sink): For kitchen sinks, a monthly boiling water flush can help to melt away any accumulating grease.
- Clean Shower Drains Regularly: Pull out hair from shower drain strainers after every few showers. Consider using a Drain Weasel monthly for a deeper clean.
- Address Slow Drains Early: If you notice a drain starting to slow down, don’t ignore it. Address it with one of the simple methods described earlier before it becomes a full clog.
Consider Drain Maintenance Products (with Caveats)
While manual cleaning and good habits are best, some maintenance products can be helpful if used correctly.
Enzyme-Based Drain Cleaners
These are generally safer for your pipes and the environment than harsh chemical cleaners. They contain natural enzymes and bacteria that break down organic waste over time.
- Best Use: Ideal for regular maintenance to prevent slow buildup. Use them as directed, often overnight, for the best results.
- Not for Immediate Clogs: They are not designed for rapid clog removal; they work slowly.
Natural Odor and Mild Buildup Reducers
Some natural products can help keep drains fresh and prevent minor buildup. Always follow product instructions and ensure they are safe for your specific plumbing.
By implementing these preventative measures and being aware of what you send down your drains, you can significantly reduce the likelihood of encountering clogs and keep your plumbing system running smoothly for years to come.
FAQs
What are the common causes of a clogged drain?
Common causes of a clogged drain include hair, soap scum, food particles, grease, and mineral buildup. These substances can accumulate in the drain over time, leading to blockages.
What tools and materials are needed to fix a clogged drain?
To fix a clogged drain, you will need a plunger, a drain snake or auger, a pair of rubber gloves, a bucket, baking soda, vinegar, and hot water. These tools and materials can help you effectively clear the blockage.
What are the steps to fix a clogged drain using a plunger?
To fix a clogged drain using a plunger, start by removing any standing water from the sink or tub. Place the plunger over the drain and ensure a tight seal. Then, push and pull the plunger vigorously to dislodge the clog. Repeat this process several times if necessary.
How can I use baking soda and vinegar to unclog a drain?
To use baking soda and vinegar to unclog a drain, start by pouring boiling water down the drain to loosen the clog. Then, pour half a cup of baking soda followed by half a cup of vinegar into the drain. Cover the drain and let the mixture sit for about 30 minutes. Finally, flush the drain with hot water to clear the clog.
When should I consider calling a professional plumber to fix a clogged drain?
If the clog persists despite your efforts to clear it using DIY methods, or if you suspect a more serious underlying issue such as a damaged pipe, it is advisable to call a professional plumber. Additionally, if you are not comfortable or experienced with handling plumbing issues, it is best to seek professional help.


