
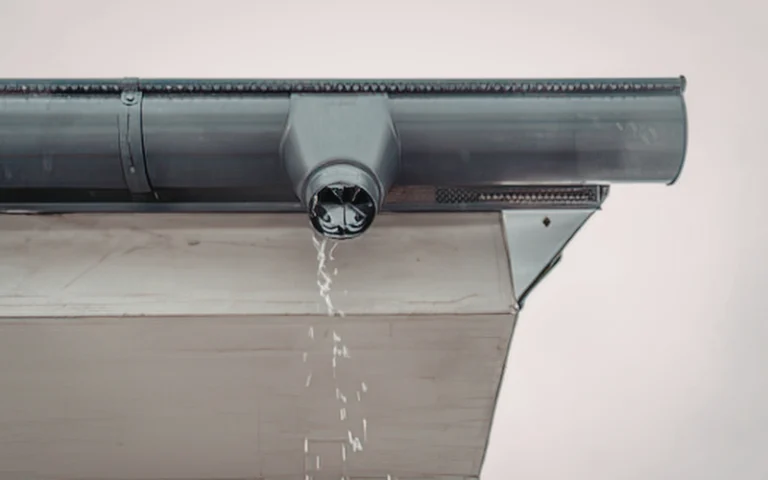

You’ve noticed it, haven’t you? That tell-tale drip, a growing stain on your ceiling, or perhaps a sudden downpour revealing an unwelcome indoor cascade. A leaking roof is more than just an inconvenience; it’s a direct threat to the integrity of your home, capable of causing extensive damage to your insulation, drywall, electrical systems, and even your foundation if left unchecked. But before you panic and call in the most expensive professional you can find, consider that many common roof leaks can be tackled with a bit of DIY know-how, the right tools, and a healthy dose of caution. This comprehensive guide will walk you through the process of identifying, preparing for, and ultimately fixing a leaking roof yourself, saving you money and giving you a valuable skill set.
Before you can fix anything, you need to know where the problem is. This might sound obvious, but water has a cunning way of traveling along rafters and sheathing, making the actual leak point surprisingly difficult to pinpoint directly above the ceiling stain.
Start Indoors, Work Your Way Out
Your first step is to go into your attic or the space directly below the leak.
- Locate the Stain: Find the water stain on your ceiling or framing. This is your starting point.
- Trace the Water’s Path: Look for water marks, discolored wood, or damp insulation starting from the stain and working your way up the rafters or trusses. Water often travels down the slope of the roof deck until it hits an obstruction or finds a gap.
- Check for Penetrations: Pay close attention to any roof penetrations near the stain. These are prime suspects for leaks. Common penetrations include:
- Vent pipes: These are often sealed with rubber or metal flashing that can crack or lift over time.
- Chimneys: The flashing around chimneys is notoriously prone to leaks, especially if it’s old or improperly installed.
- Skylights: Seals around skylights can degrade, or the glass itself might be damaged.
- Exhaust vents: Bathroom and kitchen exhaust vents that penetrate the roof also have flashing that can fail.
- Antenna mounts/Satellite Dishes: Any bolt or screw that goes through the roof without proper sealing is a potential leak source.
- Look for Mold and Mildew: The presence of mold or mildew indicates a long-standing moisture problem, further confirming the leak’s general vicinity.
- Examine Insulation: Saturated or compressed insulation directly below the stain is a strong indicator of the leak’s immediate area.
Visual Inspection of the Roof Exterior
Once you have a general idea of the leak’s location from inside, it’s time to safely access your roof. Remember, safety first! Use a sturdy ladder, wear appropriate footwear with good grip, and never work alone, especially if you’re uncomfortable with heights.
- Shingles:
- Missing or Damaged Shingles: Look for shingles that are cracked, curled, lifted, or entirely missing. Wind damage is a common culprit here.
- Granule Loss: Excessively worn shingles with significant granule loss don’t offer much protection and can be a source of leaks.
- Cracked or Brittle Shingles: Older asphalt shingles become brittle and prone to cracking, especially in extreme temperatures.
- Improperly Nailed Shingles: Nails that are exposed or driven through the wrong part of the shingle can allow water ingress.
- Flashing:
- Around Chimneys and Vents: Inspect all flashing details. Look for cracks in the caulk, lifted edges, separated seams, or rust. Step flashing (individual pieces woven into shingle courses) around chimneys and walls is particularly susceptible.
- Valley Flashing: Are the metal valleys unobstructed and in good condition? Debris can accumulate in valleys, causing water to back up and seep under shingles.
- Wall Flashing (Apron/Step Flashing): Where the roof meets a vertical wall, look for any gaps, loose pieces, or rusted areas.
- Gutters and Downspouts:
- Clogged Gutters: While not a direct leak in the roof, clogged gutters can cause water to back up under the bottom edge of your shingles, leading to soffit and fascia damage, and eventually, leaks into your attic or walls.
- Improper Slope: Gutters that don’t drain correctly will hold water, potentially causing issues.
- Roof Penetrations (Again): Re-examine all vent pipes, skylights, and other penetrations from the exterior.
- Rubber Boots: The rubber seals (collars) around vent pipes are often the first component to fail, cracking and deteriorating due to UV exposure.
- Skylight Seals: Check the seals around the glass and the frame, as well as the flashing where the skylight meets the roof deck.
- Roof Vents: Are static roof vents or ridge vents clear of obstructions and securely fastened? Loose or damaged vent covers can compromise their waterproof seal.
The Water Test (Last Resort)
If you’ve conducted thorough indoor and outdoor inspections and still can’t pinpoint the leak, a water test might be necessary. This requires a helper and a garden hose.
- Section by Section: Have your helper slowly and methodically spray water on specific sections of the roof, starting below where you suspect the leak. Begin at a lower point and work your way up to avoid confusing the source.
- Observe from Inside: While your helper is spraying, you should be in the attic, watching carefully for any drips or new moisture.
- Isolate the Area: The moment you see water, tell your helper to stop. This will help you narrow down the exact leaking area.
- Caution: This method can be time-consuming and risks introducing more water into your home if you’re not careful. Only use it if other methods fail.
Tools and Materials for the Job
Having the right tools and materials ready before you start will make the repair process much smoother and safer. Don’t skimp on quality, especially for safety equipment.
Essential Safety Gear
Your safety is paramount when working on a roof.
- Sturdy Ladder: Ensure it’s tall enough to safely reach your roof edge and extends at least three feet above the eave. Inspect it for damage before each use.
- Safety Harness and Rope (Optional but Recommended for Steep Pitches): For very steep roofs, or if you’re uncomfortable with heights, a properly secured harness can prevent serious injury.
- Non-Slip Shoes: Work boots or specialized roofing shoes with excellent grip are crucial. Avoid sneakers or worn-out footwear.
- Work Gloves: Protect your hands from sharp edges, nails, and hot surfaces.
- Safety Glasses: Protect your eyes from debris, shingles, or flying particles.
General Repair Tools
These are the basic hand tools you’ll likely need.
- Pry Bar or Flat Bar: Essential for lifting shingles without damaging them.
- Utility Knife or Hook Blade Knife: For cutting shingles, flashing, and roofing felt. A hook blade is particularly effective for shingles.
- Hammer: For securing new shingles and nails.
- Caulk Gun: For applying roofing sealant.
- Tape Measure: For accurate cutting and placement.
- Trowel or Putty Knife: For applying roof cement or flashing sealant.
- Wire Brush: For cleaning surfaces before applying sealants.
- Shingle Scraper or Roofing Shovel: If you need to remove old shingles.
- Bucket and Rags: For carrying small tools and cleaning up.
Common Repair Materials
What you’ll need will depend on the type of leak you’re fixing.
- Roofing Nails: Galvanized, hot-dipped roofing nails with wide heads are best for securing shingles. Use the correct length (typically 1-1/4″ to 1-3/4″).
- Roofing Cement/Sealant (Plastic Cement/Flashing Cement): A mastic-like material used for sealing small holes, adhering flashing, and repairing minor shingle damage. Look for a
- Fiber-Reinforced: Provides stronger adhesion and crack resistance.
- Wet/Dry Application: Some products can be applied to wet surfaces, which is useful when dealing with a leak during rain.
- Replacement Shingles: Ideally, you should have some spare shingles that match your existing roof. If not, you might need to “borrow” a few from an inconspicuous area (like under eaves) or purchase a bundle of similar color and style.
- Sheet Metal (Galvanized or Aluminum): For fabricating temporary or permanent flashing repairs, especially for step flashing or valley flashing.
- Rubber Vent Boot (Lead or EPDM): For replacing or repairing cracked vent pipe collars. Ensure you get the correct size for your vent pipe diameter.
- Self-Adhering Flashing (Ice & Water Shield): A sticky, rubberized asphalt membrane that forms a waterproof seal. Excellent for sealing around penetrations or repairing areas before shingling.
- Tarpaulin or Plastic Sheeting: For temporary patching during active rain or while you gather materials.
- Wood Shingles/Shims: Can be used to temporarily prop up shingles for easier access.
Preparing for the Repair
Proper preparation is key to a successful and safe DIY roof repair. Don’s rush this step.
Safety First, Always
Reiterate and expand on safety precautions.
- Check Weather Forecast: Never work on a wet, icy, or very windy roof. Rain makes shingles slippery, ice creates treacherous conditions, and strong winds can make you lose your balance or lift tools. Aim for a dry, calm day.
- Work During Daylight Hours: Natural light is essential for seeing details and ensuring accurate repairs. Avoid working near dusk.
- Inform Someone: Let a family member or neighbor know you’re working on the roof and when you expect to be done.
- Supervise if Possible: For more complex tasks, or if you’re feeling less confident, having a ground-based supervisor can be invaluable for handing up tools, steadying the ladder, or calling for help if needed.
- Secure Your Ladder: Make sure your ladder is on stable, level ground and securely braced. An assistant can hold the ladder for added stability.
- Avoid Power Lines: Be acutely aware of any nearby power lines and maintain a safe distance. Metal ladders are conductors and extremely dangerous near electricity.
- Know Your Limits: If the roof is too steep, too high, or the damage too extensive, don’t hesitate to call a professional. Your safety is worth more than saving a few dollars.
Cleaning the Work Area
A clean surface ensures better adhesion for sealants and a clearer view of the damage.
- Remove Debris: Sweep away leaves, twigs, dirt, and any other loose debris from the affected area.
- Clear Gutters (if applicable): If clogged gutters are contributing to the problem, clear them out now.
- Scrape Away Old Sealant/Tar: Use a utility knife or scraper to carefully remove any old, cracked, or loose caulk or roofing cement. You want a clean, dry surface for new material.
- Dry the Area: If the roof is damp from a recent leak or cleaning, let it dry completely before applying any new sealants or materials. A leaf blower or careful use of a heat gun (on low, held at a distance) can speed up drying.
Gathering and Organizing Materials
Lay out all your tools and materials within easy reach.
- Tool Belt or Bucket: Use a tool belt or a sturdy bucket with a handle to carry your essential tools and materials up to the roof. This minimizes trips up and down the ladder.
- Pre-Cut Materials: If you need replacement shingles or flashing, cut them to size on the ground if possible.
- Open Sealants: Have your tubes of roofing cement or caulk ready in the gun.
Temporary Patching (If Necessary)
If it’s raining or threatening to rain, or if you need more time to gather materials, a temporary patch can prevent further water damage.
- Plastic Sheeting or Tarp: Drape a heavy-duty plastic sheet or tarp over the damaged area, extending well beyond the leak.
- Secure with Weights/Battens: Use bricks, heavy wood scraps (battens), or 1x2s nailed down (carefully!) to hold the tarp in place, especially around the edges.
- Sloping: Position the tarp so water will drain off it, not collect.
Common DIY Roof Repairs
Now that you’ve identified the leak and prepared your workspace, let’s get into the specifics of fixing different types of damage.
Repairing Damaged or Missing Shingles
This is one of the most common and straightforward roof repairs.
- Replacing a Single Shingle:
- Lift Adjacent Shingles: Carefully use a pry bar or flat bar to gently lift the bottom edges of the surrounding shingles (the ones above and to the sides of the damaged shingle). Be gentle to avoid cracking them.
- Remove Nails: Locate the nails holding the damaged shingle in place. These are usually hidden directly under the overlapping shingle above it. Use your pry bar to pry up the shingle slightly and expose the nail heads. Use the claw of your hammer to pull them out.
- Remove Damaged Shingle: Once the nails are out, carefully slide out the damaged shingle. If it’s adhered by old tar, you might need to gently cut it free with your utility knife.
- Insert New Shingle: Slide a new shingle into place, ensuring it aligns perfectly with the shingles on either side and the one below it. The top edge of the new shingle should fit snugly where the old one was.
- Nail it Down: Lift the overlapping shingle above the new one and carefully nail the new shingle into the roof deck with 4-6 roofing nails. Place nails about 1 inch above the cutouts (tabs) and 1 inch in from each side. Make sure the nail heads are flush with the shingle, not sunken or protruding.
- Seal and Adhere: Apply a small dab of roofing cement under the edges of the new shingle and the bottom edges of any lifted shingles to help them seal down and prevent wind uplift. Press firmly.
- Repairing a Cracked Shingle:
- Clean and Dry: Ensure the shingle is clean and completely dry.
- Apply Cement: Lift the cracked shingle slightly and apply a generous bead of roofing cement underneath the crack.
- Smooth and Press: Press the shingle firmly back down, smoothing out the cement. Apply a thin layer of roofing cement over the top of the crack as well, ensuring it’s sealed. For extra durability, you can embed a small piece of mesh or roofing fabric into the wet cement before adding a final top coat.
- Nail (Optional): If the crack is severe, you might insert a couple of new nails through the shingle on either side of the crack, making sure to cover the nail heads with roofing cement.
Fixing Leaks Around Vent Pipes
Vent pipes are a very common source of leaks due to the deterioration of their rubber boots.
- Replacing a Rubber Vent Boot:
- Remove Old Boot: Carefully use your utility knife to cut away the old rubber boot and any old sealant or caulk around the pipe. You might need to gently pry up some surrounding shingles to access the nails holding the old flashing in place.
- Slide Off Old Flashing: Once the nails are removed, you can slide the entire old flashing unit up and off the pipe.
- Clean Area: Scrape away any remaining old tar or debris from the roof deck around the pipe.
- Slide On New Boot: Slide the new rubber vent boot (metal flashing attached) down over the vent pipe. Ensure the bottom edge of the flashing sits over the shingles below it, and the sides slip under the shingles adjacent to it, and the top slides under the shingles above it. This ensures proper water shedding.
- Nail in Place: Secure the metal flashing plate to the roof deck with roofing nails, placing them about 1 inch from the edges. Make sure the nail heads are covered by the overlapping shingles above and to the sides.
- Seal It: Apply a bead of roofing cement along the top edge of the flashing (where it meets the overlapping shingles) and around the base of the rubber collar where it meets the pipe. This provides an extra layer of protection.
- Temporary Repair for a Cracked Boot: If you can’t immediately replace the boot, clean the cracked area thoroughly and apply a generous amount of roofing cement directly to the crack. For better reinforcement, you can embed a patch of roofing fabric or even a piece of old inner tube into the wet cement. This is a temporary fix, so plan for a full replacement.
Repairing Flashing Leaks (Chimneys, Skylights, Walls)
Flashing is critical for waterproofing areas where the roof meets a vertical surface. Leaks often occur due to failed caulk, rust, or improper installation.
- Repairing Step Flashing (Chimneys, Walls):
- Identify Damaged Section: Step flashing consists of individual L-shaped pieces woven into the shingle courses. Locate the specific piece(s) that are leaking, rusted, or bent.
- Remove Old Nails/Caulk: Carefully lift the overlapping shingle(s) and pry out any nails holding the damaged step flashing piece. Cut away any old caulk.
- Slide Out/Clean: Gently slide out the damaged step flashing. Clean the area thoroughly.
- Insert New Flashing: Slide a new piece of step flashing into place, ensuring it’s properly woven under the shingle above it and over the shingle below it.
- Nail and Caulk: Nail the new flashing piece to the roof deck (not through the shingle) at its top edge. Apply a bead of high-quality exterior caulk or roofing cement along the seam where the flashing meets the vertical wall. Ensure this caulk is compatible with your flashing material.
- Check Counter-Flashing (Chimneys): For chimneys, check the counter-flashing (the metal embedded in the mortar joints that overlaps the step flashing). If it’s loose or cracked, it may need to be re-mortared or re-caulked with a siliconized masonry sealant.
- Repairing Valley Flashing:
- Clean Debris: Remove any leaves, branches, or other debris that might be clogging the valley.
- Inspect for Damage: Look for holes, rust, or lifted seams in the metal valley flashing.
- Seal Small Holes/Cracks: For minor damage, clean the area and apply a generous amount of fiber-reinforced roofing cement over the hole or crack. You can embed a piece of flashing membrane or fiberglass mesh into the wet cement for added strength.
- Major Damage: If the valley flashing is extensively rusted or has large splits, it’s a more involved repair. You might need to remove shingles on both sides of the valley to replace the entire section of flashing. This is often best left to a professional, as improper installation can lead to larger leaks.
- Repairing Skylight Leaks:
- Inspect Seals: First, check the rubber or silicone seals around the glass pane itself. If they are cracked or dry-rotted, carefully scrape away the old sealant and apply a new bead of high-quality, UV-resistant exterior silicone sealant.
- Inspect Flashing: Next, inspect the flashing around the skylight frame where it meets the roof. Look for cracks, separated seams, or rust.
- Re-Seal Flashing: Clean the damaged flashing thoroughly. Apply roofing cement or a specialized elastomeric sealant to any compromised areas. For larger gaps, you might need to insert small pieces of metal patch, secured with sealant.
Sealing Small Holes and Cracks
Sometimes, leaks stem from tiny punctures or hairline cracks in shingles or the roof deck itself.
- Nail Pops: When a nail secures a shingle but pops up over time, it can create a tiny opening for water.
- Pry Up Shingle: Gently lift the shingle above the nail pop.
- Hammer Down Nail: Hammer the popped nail back down, ensuring the head is flush.
- Add New Nails: Drive two new roofing nails into the shingle, just above the original nail, ensuring they penetrate the roof deck.
- Seal: Apply a dab of roofing cement over all nail heads and press the shingle back down.
- Small Punctures (e.g., from falling branches):
- Clean and Dry: Ensure the area is clean and completely dry.
- Apply Cement: Apply a generous dollop of fiber-reinforced roofing cement over the puncture.
- Spread Evenly: Use a trowel or putty knife to spread the cement evenly, ensuring it covers the hole and overlaps onto the surrounding shingle.
- Reinforce (Optional): For larger punctures, embed a piece of tar paper or roofing fabric into the wet cement for added strength, then cover with more cement.
Post-Repair Inspection and Maintenance
- Interior Check: After the repair, go back into your attic or the interior space. Look for any lingering signs of moisture, even small damp spots. This might indicate that the leak was more extensive than anticipated or that there’s another source. Wait for the next rain shower and check again.
- Exterior Check: From a safe distance on your ladder, visually inspect the repaired area. Does everything look neat and correctly installed? Are all new sealants smoothly applied? Are any lifted shingles properly re-adhered?
Ongoing Maintenance (Prevention is Key!)
Regular attention to your roof can prevent small issues from becoming major leaks.
- Annual Roof Inspection: At least once a year, preferably in the spring and fall, conduct a visual inspection of your entire roof. Look for any:
- Missing, curled, or cracked shingles.
- Excessive granule loss in gutters or downspouts.
- Damaged or missing flashing around penetrations.
- Clogged gutters or downspouts.
- Debris accumulation (especially in valleys or around chimneys).
- Moss or algae growth (which can trap moisture).
- Clean Gutters Regularly: Clear leaves, shingle granules, and other debris from your gutters and downspouts at least twice a year, or more often if you have many trees nearby. This prevents water backup that can lead to fascia rot and roof leaks.
- Trim Overhanging Branches: Trees with branches overhanging your roof can drop debris, scratch shingles, and provide pathways for squirrels or other pests. Trim them back to prevent damage.
- Address Moss/Algae Promptly: Moss and algae can trap moisture against your shingles, leading to premature deterioration. Gently remove them with a soft brush and consider applying zinc or copper strips to the ridge, which will release growth-inhibiting compounds with rain.
- Check Attic Ventilation: Proper attic ventilation helps regulate temperature and removes moisture, preventing ice dams in winter and extending the life of your shingles. Ensure your soffit and ridge vents are clear and unobstructed.
- Be Mindful of Foot Traffic: Avoid unnecessary walking on your roof, especially older or brittle shingles, as this can cause damage. If you do need to walk on it, do so carefully and evenly distribute your weight.
Fixing a leaking roof yourself can be a rewarding and money-saving experience. By carefully identifying the source, gathering the right tools, prioritizing safety, and following these detailed steps, you can confidently tackle many common roof repairs. Remember, however, that your safety is always paramount, and for extensive damage, steep roofs, or if you ever feel uncomfortable, don’t hesitate to call a qualified roofing professional. A well-maintained roof is your home’s first line of defense against the elements, and with these DIY tips, you’re well-equipped to keep it in top shape.
FAQs
What are the common causes of a leaking roof?
Some common causes of a leaking roof include damaged or missing shingles, cracked flashing, clogged gutters, and improper installation of roofing materials.
How can I temporarily fix a leaking roof?
You can temporarily fix a leaking roof by using roofing cement to seal small cracks or holes, applying a tarp over the damaged area, or using a temporary sealant to stop the leak until a professional can make permanent repairs.
When should I consider hiring a professional to fix a leaking roof?
You should consider hiring a professional to fix a leaking roof if the damage is extensive, if the leak is causing significant water damage inside your home, or if you are unable to safely access the roof to make repairs yourself.
What are the steps to fix a leaking roof on my own?
The steps to fix a leaking roof on your own include identifying the source of the leak, clearing debris from the damaged area, applying roofing cement or sealant, and ensuring that the repair is properly sealed and secure.
How can I prevent future roof leaks?
To prevent future roof leaks, you can regularly inspect your roof for damage, keep gutters and downspouts clear of debris, trim overhanging tree branches, and ensure that your roof is properly ventilated and insulated.


