
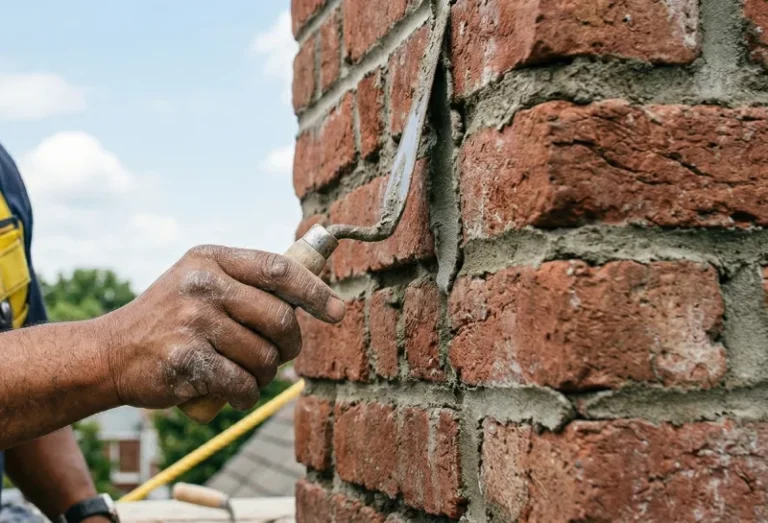

Key Highlights: Tuckpointing involves removing old, deteriorated mortar and replacing it with fresh mortar. The process is vital for maintaining the structural integrity of brick buildings and preventing water damage. Signs that your home needs tuckpointing include cracked, crumbling, or missing mortar between bricks. Benefits include enhanced curb appeal, increased property value, and improved energy efficiency. While DIY is possible, professional tuckpointing is recommended for quality, safety, and long-lasting results. Regular inspections and timely repairs can prevent more costly and extensive structural issues down the line.
Introduction
Welcome to our essential guide for homeowners! Brick structures are celebrated for their strength and classic charm, but the mortar holding them together can wear down over time. Exposure to weather and general aging can compromise your home’s stability. This is where the tuckpointing process comes in. It’s a crucial type of masonry work that restores the health and beauty of your home’s brick. In this post, we’ll walk you through what tuckpointing is, why it matters, and how it protects your valuable property.
Understanding Tuckpointing for Homeowners
If you own a brick home, you’ve likely heard the term “tuckpointing,” but what does it really mean for you? Essentially, it’s the method of repairing the mortar joints that hold your bricks together. This isn’t just a cosmetic fix; it’s a critical maintenance task.
The tuckpointing process is fundamental to preserving the structural integrity of your home. By addressing weakened mortar, you are actively protecting your property from potential damage and ensuring it remains strong for years. Let’s look closer at what this process involves and why it’s so important.
Definition and Importance of Tuckpointing
So, what is tuckpointing and why is it important for brick buildings? Tuckpointing is the careful process of removing old mortar from the joints between bricks and replacing it with new, fresh mortar. Over time, the original mortar is exposed to elements like rain and temperature changes, causing it to crack and crumble. This deterioration can lead to serious problems if ignored.
The primary importance of this repair lies in protecting your home’s structural integrity. Mortar acts as the glue for your masonry, and when it fails, the entire structure can become unstable. By refreshing the mortar joints, you reinforce the wall, preventing bricks from shifting or becoming loose. This preemptive measure is key to avoiding more significant structural issues.
Furthermore, the tuckpointing process is vital for preventing water infiltration. Gaps in the mortar provide an easy pathway for moisture to seep into your walls, which can lead to mold growth, foundational damage, and other expensive repairs. Sealing these gaps ensures your home remains dry and secure.
Historical Perspective on Tuckpointing in the United States
Tuckpointing has a rich history that dates back to 18th-century England. Originally, it was an aesthetic technique used to create the illusion of very fine, precise brickwork. Craftsmen used different colors of mortar to make the joints look incredibly thin and neat, which was a popular look during the Georgian and Victorian eras. This masonry work gave brick buildings a polished, high-end appearance.
As the practice spread, its functional benefits became more widely recognized. In the United States, tuckpointing became common during the 19th and early 20th centuries, especially in rapidly growing cities. Builders and homeowners realized it was an effective way to repair deteriorating mortar on older homes and new constructions alike, protecting them from the elements.
Today, while the decorative aspect has evolved, the core purpose of tuckpointing remains focused on preservation. For older homes and historic brick buildings across the country, it is an essential maintenance practice that preserves both the structural soundness and the architectural heritage of the property.
Common Types of Masonry Requiring Tuckpointing
While often associated with brick homes, tuckpointing is a necessary repair for various types of masonry. Any structure held together by mortar will eventually face deterioration and can benefit from this restoration process. The fundamental issue is the same across different materials: damaged mortar compromises the structure’s stability and weather resistance.
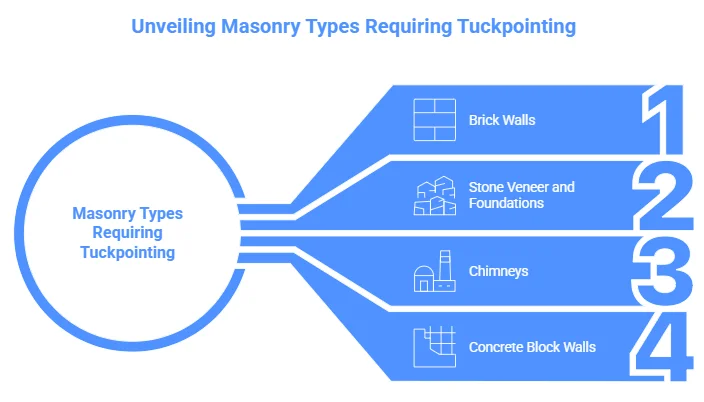
Stone structures, for example, also rely on mortar to fill the gaps between stones and provide stability. Just like with brick, the mortar in stonework can erode due to weather exposure, requiring tuckpointing to restore its integrity and prevent water from seeping in. Chimneys are another prime candidate, as they are highly exposed to the elements and temperature fluctuations.
Here are some common types of masonry that often require tuckpointing:
- Brick Walls: This is the most common application, seen on the exterior walls of countless homes.
- Stone Veneer and Foundations: Both natural and manufactured stone structures need strong mortar joints.
- Chimneys: Constant exposure makes chimney mortar particularly vulnerable to decay.
- Concrete Block Walls: Used in foundations and other structures, these also rely on mortar that can degrade.
Recognizing When Your Brickwork Needs Tuckpointing
Knowing the signs of mortar deterioration is key to protecting your home. If you catch the problem early, you can prevent small issues from turning into major headaches. Look closely at your brickwork every so often, especially after harsh weather seasons.
Obvious signs like crumbling or missing mortar are clear calls to action. Ignoring these warnings allows moisture and pests to enter, leading to further damage that can be much more expensive to fix. Below, we’ll detail the specific indicators that your brickwork needs attention.
Signs of Mortar Joint Deterioration
What signs indicate that my bricks need tuckpointing? Paying attention to the condition of your mortar joints can save you from costly repairs. The most obvious indicator is visually damaged mortar. If you can see it crumbling or falling out, it’s a clear signal that action is needed.
Another tell-tale sign is the presence of cracks in the mortar. These can be hairline fissures or larger gaps, but any crack suggests the mortar is weakening and losing its ability to support the bricks. Similarly, sections of missing mortar create vulnerabilities in your wall system. You might also spot a chalky white residue on your bricks, known as efflorescence. This indicates that water is absorbing into the masonry, often through failing mortar joints.
Here are some key signs to watch for:
- Visible cracks in the mortar lines.
- Crumbling, powdery, or soft mortar.
- Gaps where mortar is completely missing.
- A white, chalky substance (efflorescence) on the brick surface.
- Loose or shifting bricks that move when touched.
How Aging and Weather Affect Masonry
Masonry structures are built to be durable, but they aren’t immune to the effects of time and weather. The constant cycle of seasons, especially in regions with fluctuating temperatures, puts significant stress on mortar joints. Water is the primary culprit behind most masonry damage. Rain and snow can saturate the brick surface and seep into the mortar.
During winter, this absorbed moisture freezes and expands, a process known as the freeze-thaw cycle. This expansion exerts immense pressure on the mortar, causing it to crack and break apart from within. Over many years, this repeated cycle leads to progressive weakening and further deterioration of the joints, leaving your brickwork vulnerable.
Sunlight and wind also play a role. UV rays can degrade the chemical binders in mortar, while wind-driven rain can accelerate erosion. If these issues are not addressed, the gradual decay can eventually lead to serious structural issues, compromising the safety and stability of your entire home.
Potential Consequences of Neglecting Tuckpointing
Delaying tuckpointing can turn a relatively simple maintenance task into a major financial burden. When mortar joints are left to decay, they expose your home to significant risks. The most immediate threat is water infiltration. Yes, tuckpointing can help prevent water damage in brick or stone structures by sealing these entry points. Without this protection, moisture can penetrate deep into your walls.
This unchecked water infiltration can lead to a host of problems, including mold and mildew growth inside your home, which poses health risks. It can also cause the wooden components of your wall structure to rot. Over time, the lack of support from the mortar can lead to severe structural damage, where bricks may loosen, shift, or even fall out.
Neglecting these early warning signs will likely result in the need for much more extensive repairs. Instead of a straightforward tuckpointing job, you could be facing:
- Complete brick replacement.
- Full wall reconstruction.
- Foundation repairs due to water damage.
- Other costly repairs to fix interior damage.
The Tuckpointing Process Explained
The tuckpointing process is a methodical craft that restores both the function and appearance of your masonry. It involves more than just slapping some new mortar into the gaps. The first step is the careful process of removing the old, failing mortar from the joints to a specific depth.
Once the joints are prepared, fresh new mortar is skillfully applied to create a strong, durable bond that seals out moisture. This detailed work ensures the repair is not only effective but also aesthetically pleasing. Let’s break down the tuckpointing process step-by-step to see how it works.
Step-by-Step Overview for Repairing Mortar Joints
How does the tuckpointing process work for repairing mortar joints? It’s a systematic procedure that requires precision at every stage. The first step is a thorough inspection to identify all areas with deteriorated mortar. Then, the real work begins with the removal of the old mortar. Professionals often use an angle grinder or specialized tools to carefully grind out the joints to a uniform depth without damaging the surrounding bricks.
After the old mortar is removed, the joints must be cleaned thoroughly. All dust and debris are brushed or washed out to ensure the fresh mortar can form a strong bond with the existing masonry. Next, the new mortar, which is carefully color-matched, is applied in layers. This is a crucial step that requires skill to pack the mortar tightly into the joints.
Finally, the mortar is “tooled” to create a finished look that matches the original style of the brickwork. This final touch creates a clean, uniform appearance. The new mortar then needs time to cure properly, forming a weather-resistant seal.
| Step | Description |
|---|---|
| 1. Inspection | Assess the condition of the mortar joints to identify all damaged areas. |
| 2. Mortar Removal | Carefully grind or chisel out the old, deteriorated mortar to a consistent depth. |
| 3. Joint Cleaning | Remove all dust and loose debris from the joints using brushes or water. |
| 4. Mortar Application | Apply fresh, color-matched mortar in layers to fill the joints completely. |
| 5. Tooling & Finishing | Shape the new mortar to match the existing joint profile for a seamless look. |
| 6. Curing | Allow the new mortar to slowly dry and harden to achieve maximum strength. |
Essential Tools and Materials Used
A successful tuckpointing project relies on using the right materials and tools. The most critical material is the new mortar itself. What materials are used during the tuckpointing process? Mortar is typically a mixture of sand, lime, and a bonding agent like Portland cement. The exact composition is crucial; it must be compatible with the strength and porosity of your bricks and the color of the existing mortar to ensure a seamless repair.
For older homes, a lime-based mortar is often used because it is softer and more breathable, which is better suited for historic brick. Using a mortar that is too hard can cause the brick wall to crack under pressure. Pigments can be added to the mix to match the original mortar color, ensuring the repair blends in perfectly.
A variety of specialized tools are also necessary for a professional result. These range from power tools for removal to hand tools for application and finishing. Key tools include:
- An angle grinder with a diamond blade for removing old mortar.
- Pointing trowels and jointers of various sizes for applying and shaping the new mortar.
- Brushes for cleaning out the joints.
- A hawk or mortarboard for holding the mortar during application.
Comparing Tuckpointing vs. Repointing Techniques
The terms “tuckpointing” and “repointing” are often used interchangeably, but they technically refer to different processes. What are the main differences between tuckpointing and repointing? The primary distinction lies in the final aesthetic goal and scope of work. Repointing is the general process of removing old mortar and replacing it with fresh mortar. Its main purpose is purely structural repair.
Tuckpointing, on the other hand, is a more specialized form of repointing that includes an extra cosmetic step. After the joints are filled with new mortar that matches the brick color, a thin line of a contrasting color (usually white or black) is “tucked” into the center of the joint. This creates the illusion of very fine, perfect joints.
While the historical, decorative tuckpointing process is less common today, the term is widely used in the United States to refer to the entire process of repairing mortar joints. For most homeowners, the key differences are:
- Repointing: The functional process of replacing deteriorated mortar.
- Tuckpointing: Often used to describe the entire repair process, but traditionally involves a decorative finish.
- Goal: Repointing focuses solely on structural repair, while classic tuckpointing adds a visual enhancement.
Benefits of Tuckpointing for Homeowners
Investing in tuckpointing offers numerous advantages that go far beyond simple aesthetics. The primary benefit of tuckpointing is the restoration of your home’s structural integrity. By reinforcing the mortar joints, you are safeguarding your home against serious structural failures.
This crucial maintenance also acts as your first line of defense against water damage, preventing moisture from penetrating your walls. In the following sections, we will explore how tuckpointing can improve your home’s durability, energy efficiency, and overall value.
Enhancing Structural Integrity and Longevity
One of the most critical benefits of tuckpointing is its ability to fortify the structural integrity of your home. The mortar in your walls is what holds everything together, and when it weakens, the stability of the entire structure is at risk. Loose or shifting bricks are a direct result of failing mortar, which can lead to dangerous and expensive structural issues.
By applying new mortar, tuckpointing re-establishes the strong bond between your bricks. This reinforcement ensures that your walls can effectively bear weight and resist external pressures from wind and ground movement. It is a proactive step that significantly extends the lifespan of your masonry.
Maintaining the integrity of your brickwork through regular tuckpointing is an investment in the long-term health of your property. It prevents minor deterioration from escalating into major structural failures, ensuring your home remains safe, stable, and durable for decades to come.
Improving Energy Efficiency and Preventing Water Damage
Did you know that tuckpointing can also help lower your energy bills? Gaps and cracks in your mortar joints allow for air leakage, creating drafts that make your home less comfortable. This air exchange forces your heating and cooling systems to work harder to maintain a stable indoor temperature, leading to higher energy consumption.
By sealing these gaps, tuckpointing improves the insulation of your home, contributing to better energy efficiency. A well-sealed building envelope minimizes heat loss in the winter and heat gain in the summer, helping you save money on your monthly utility costs. This makes your home not only more comfortable but also more environmentally friendly.
In addition to enhancing energy efficiency, tuckpointing is a powerful tool for preventing water damage. Here’s how it helps:
- Seals Entry Points: It creates a water-tight barrier, stopping rain and snow from seeping into your walls.
- Prevents Mold: By keeping moisture out, it eliminates the conditions needed for mold and mildew to grow.
- Protects the Foundation: It prevents water from running down and pooling around your foundation, a common cause of serious structural problems.
Boosting Curb Appeal and Property Value
There’s no doubt that tuckpointing can dramatically improve the appearance of aging brickwork. Cracked, discolored, and crumbling mortar can make a house look neglected and old. By replacing it with fresh, clean mortar lines, tuckpointing revitalizes the entire look of your home’s exterior walls, giving them a crisp and well-maintained appearance.
This enhancement in curb appeal does more than just make your house look better; it also increases your property value. A home with a sound and attractive exterior is far more appealing to potential buyers. A well-maintained brick facade signals that the home has been cared for, which can be a significant selling point and justify a higher asking price.
Investing in tuckpointing is a smart move if you’re planning to sell your home in the future. It’s a relatively small investment that can yield a significant return by making your property stand out in the market. The clean lines and restored color of the brickwork create a strong first impression that can make all the difference.
Professional vs. DIY Tuckpointing
When it comes to tuckpointing, you have two main options: hire a professional or attempt a DIY repair. While doing it yourself might seem like a way to save money, masonry work is a specialized skill. For a small, isolated crack, a DIY patch might suffice, but for larger projects, the expertise of masonry repair services is invaluable.
The scope of work, the tools required, and the need for a perfect mortar match often make professional tuckpointing the wiser choice. Let’s weigh the pros and cons of each approach to help you decide what’s best for your home.
Pros and Cons of Hiring a Professional
Deciding whether to hire a professional or tackle tuckpointing yourself is a common dilemma. While professional tuckpointing involves a higher upfront cost, the benefits often outweigh the expense. Professionals bring years of experience, ensuring a high-quality, long-lasting repair. They know how to properly prepare the joints, mix the right mortar, and apply it for a seamless finish.
Is tuckpointing a DIY project or should I hire a professional? For anything beyond a very minor patch, hiring a pro is recommended. They have the right tools and expertise to handle a large scope of work efficiently and safely, especially if working at heights is required. Using the wrong mortar type or application technique can cause more damage to your bricks, leading to more expensive repairs later.
Here’s a quick breakdown of the pros and cons of hiring a professional:
- Pros: High-quality results, proper material matching, safety, and long-term durability.
- Cons: Higher initial cost compared to DIY.
- Benefit: A professional job comes with peace of mind and often a warranty.
- Consideration: They can accurately assess the full scope of work, identifying issues you might miss.
Safety Considerations for Homeowners
If you decide to take on a DIY tuckpointing project, safety must be your top priority. The process involves tools and materials that can be hazardous if not handled correctly. Using an angle grinder to remove old mortar, for example, creates a significant amount of silica dust, which is harmful to inhale. Always wear a high-quality respirator, safety glasses, and gloves.
Working on ladders or scaffolding presents another major safety risk. Falls are a leading cause of injury for DIY enthusiasts. Ensure your ladder is stable and never overreach. For jobs that require working on upper stories, it is almost always safer to hire a professional with the proper scaffolding and safety equipment.
Remember these key safety tips for any DIY work on your mortar joints:
- Protective Gear: Always wear a respirator, eye protection, and heavy-duty gloves.
- Ladder Safety: Make sure your ladder is secure and follow all safety guidelines for working at heights.
- Tool Handling: Understand how to operate your tools, like an angle grinder, safely to avoid injury and damage to your bricks.
Cost Factors and Frequency of Tuckpointing
Understanding the potential tuckpointing costs and how often the service is needed can help you budget for this essential home maintenance. The price can vary widely based on several factors, including the extent of the damage and the accessibility of the work area.
Performing regular tuckpointing when needed is far more cost-effective than waiting until you need major brick replacement. Let’s explore the typical costs and recommended frequency to help you plan ahead and protect your investment.
Typical Pricing for Small Houses in the US
How much does tuckpointing typically cost for a small house? The cost can vary significantly depending on your location, the extent of the damage, and the contractor you hire. Tuckpointing is typically priced per square foot, with national averages ranging from $5 to $25 per square foot. The price tends to be higher for complex jobs or historic homes that require special mortar.
For small houses, the total cost will depend on the scope of work. If you only need a small section or a chimney repaired, the cost might be a few hundred to a couple of thousand dollars. However, if the entire house needs tuckpointing, the project could cost several thousand dollars or more.
It’s always a good idea to get multiple quotes from reputable contractors. They can provide an accurate estimate based on a direct inspection of your property. The table below gives a general idea of potential costs, but remember these are just estimates.
| Scope of Work | Estimated Cost Range |
|---|---|
| Small Patch Repair (e.g., around a window) | $300 – $800 |
| Chimney Tuckpointing | $500 – $2,500 |
| One Wall of a Small House | $1,500 – $5,000+ |
| Entire Small House | $4,000 – $15,000+ |
How Often Should Tuckpointing Be Done?
How often should tuckpointing be done on a typical brick home? There is no one-size-fits-all answer, as the lifespan of mortar joints depends on several factors. A well-constructed brick wall with high-quality mortar can last for 25 to 50 years or even longer before needing significant repairs. However, factors like climate, exposure to moisture, and the quality of the original construction play a huge role.
For most homeowners, the best approach is to conduct regular inspections of your home’s exterior. At least once a year, walk around your property and look closely at the mortar joints. If you start to see signs of cracking or crumbling, it’s time to consider tuckpointing. Older homes may require more frequent attention due to the use of softer, lime-based mortars.
A lack of maintenance is the fastest way to shorten the life of your mortar. Addressing small problems as they appear can prevent the need for a large-scale tuckpointing project. Regular tuckpointing is simply part of responsible homeownership, especially for those with brick properties.
Factors Influencing Tuckpointing Costs
Several key factors will influence the final cost of your tuckpointing project. The most significant is the overall scope of work. A small repair on a single brick wall will naturally cost much less than tuckpointing an entire home. The extent of the damage also matters; if the mortar is severely deteriorated, more time and labor will be needed for removal.
The type of masonry is another important consideration. Working with historic brick or soft stone requires more care and specialized mortar, which can increase the price. Accessibility also plays a big role. Hard-to-reach areas, such as high gables or complex chimney structures, require scaffolding and extra safety measures, adding to the labor costs.
Here are some of the main factors that influence tuckpointing costs:
- Extent of Damage: The more mortar that needs to be replaced, the higher the cost.
- Accessibility: Walls that are difficult to reach will increase labor costs.
- Type of Brick/Mortar: Historic or custom materials require more expertise and can be more expensive.
- Geographic Location: Labor rates vary significantly from one region to another.
Conclusion
In conclusion, tuckpointing is not just a cosmetic enhancement; it plays a vital role in maintaining the structural integrity and longevity of your home. By recognizing the signs that your brickwork may need attention, understanding the tuckpointing process, and weighing the benefits of professional versus DIY options, you can make informed decisions to protect your investment. Remember, regular maintenance can prevent costly repairs down the road and enhance your property’s curb appeal. If you’re considering tuckpointing for your home, reach out for a free consultation to explore your best options and ensure your home stands the test of time.
Frequently Asked Questions
What materials are best for tuckpointing brick homes?
The best new mortar for tuckpointing brick homes depends on the age of the house. Modern brick homes often use a mortar with Portland cement (Type N or S). For older masonry work, a softer, lime-based mortar is better, as it needs to be softer than the old mortar and bricks to prevent damage.
Can tuckpointing be done during cold or rainy weather?
It is best to avoid the tuckpointing process during rainy or freezing weather. The new mortar needs to cure properly, and temperatures below 40°F can prevent it from setting correctly, leading to weak mortar joints. Excess moisture from rain can also wash out the fresh mortar before it hardens.
Does tuckpointing significantly improve the appearance of old brickwork?
Yes, absolutely. Replacing old, crumbling mortar with fresh mortar dramatically enhances the appearance of brickwork. This restoration boosts curb appeal by creating clean, sharp lines, which can make an old home look well-maintained and revitalized. This improved look often leads to an increase in property value.


